Monday, March 31, 2014

HFM 11.1.2.3 (5) - Extract data to Database

In the old version of HFM, this feature is called "Extended Analytics". And now, it was integrated to Extract Data Task. You need to define the Destination Database DSN (Data Source Name) before it can be used.


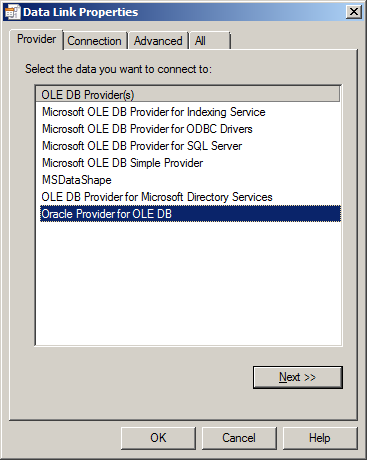
Create a new Text Document, and rename it with "udl" extension (e.g. DSN001.udl). And then open this file, click the Provider Tab, select Oracle Provider for OLE DB and then click Next

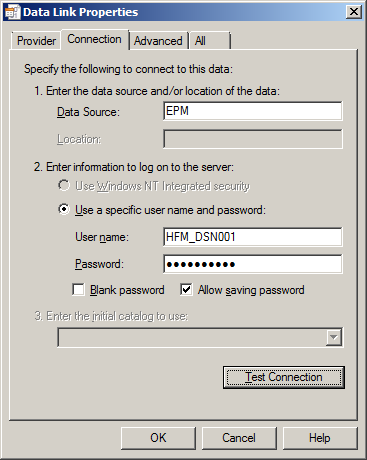
In Connection Tab, input your Data Source Name and input User name and Password for the Destination Database. Check Allow saving password and then click Test Connection.

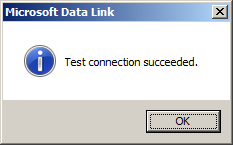
Displayed Test connection succeeded.

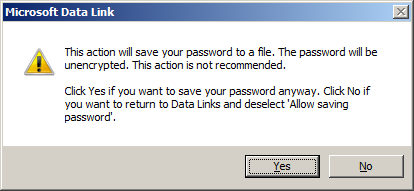
And the you can click OK to save the profile, click Yes to continue.

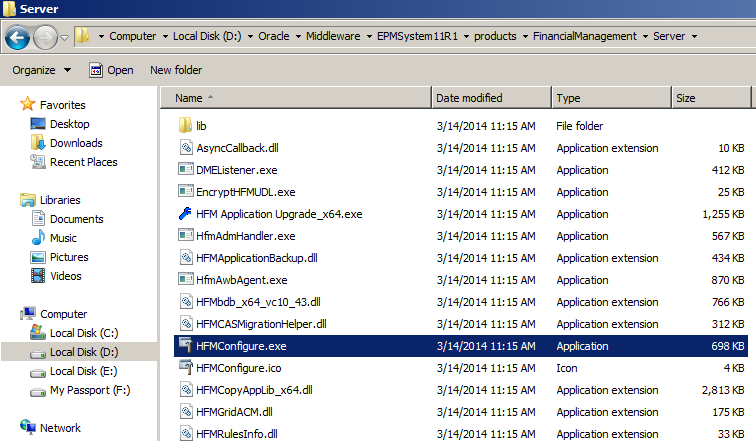
In your HFM server, go to the folder D:\Oracle\Middleware\EPMSystem11R1\products\FinancialManagement\Server, and found the utility called HFMConfigure.exe.

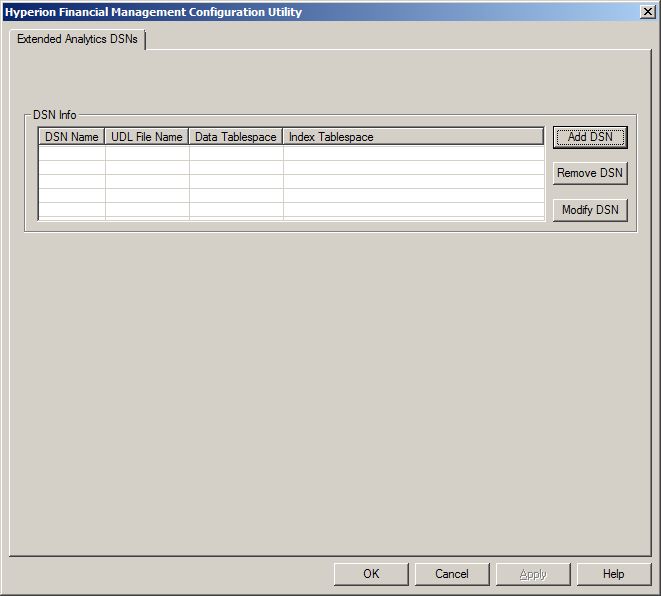
Double click to open the utility, and you can define Extended Analytics DSNs here. Click Add DSN.

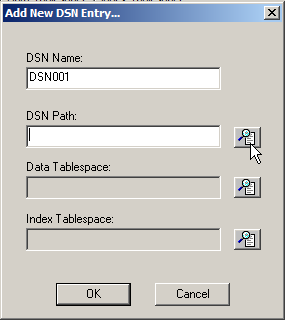
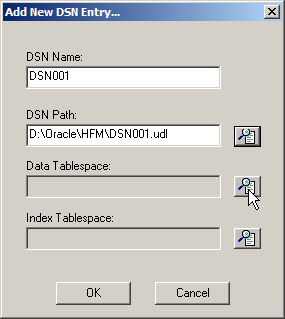
Input the DSN Name, and then click to select the DSN Path

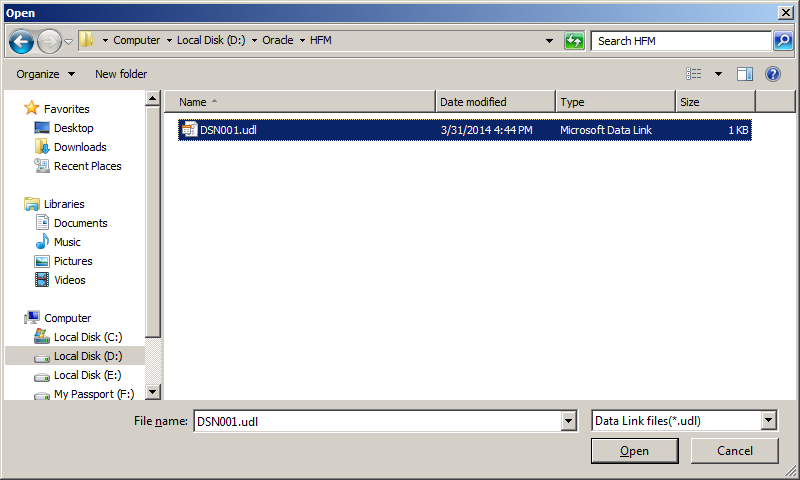
Find the udl file saved before.

Then click to select Data Tablespace.

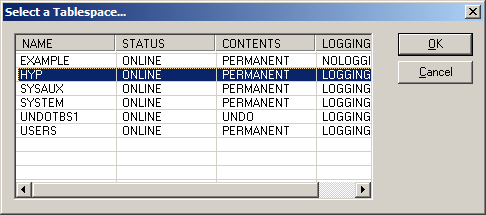
Select your preferred Tablespace.

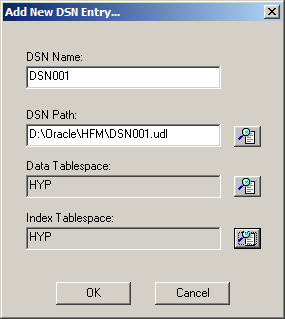
Same step to select the Index Tablespace and then click OK to save.

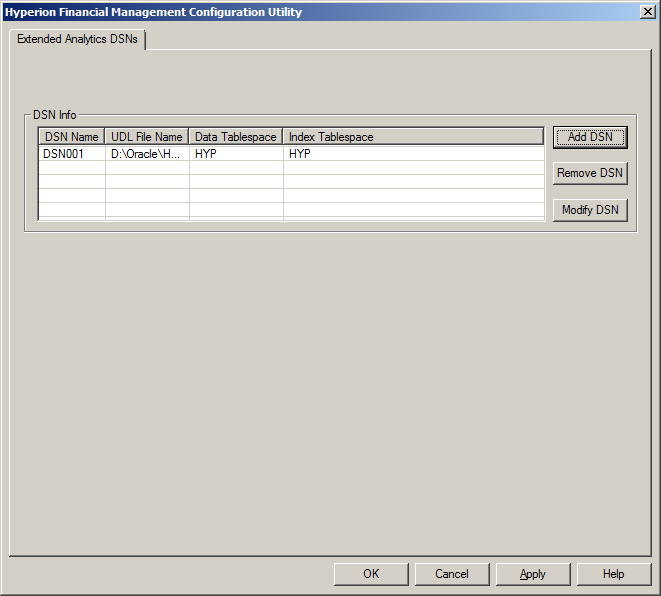
Then you can find your DSN created successfully.

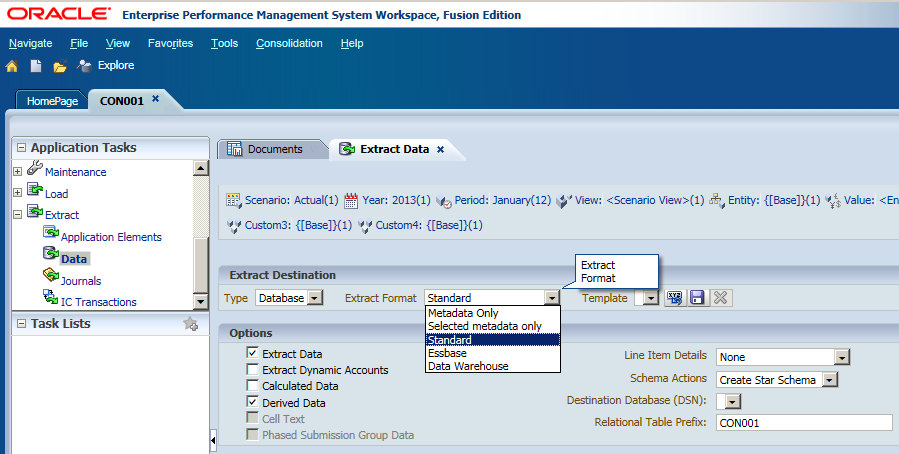
Now login to HFM and locate to Extract Data. Select Extract Type to Database and Extract Format to Standard. Now you can select the DSN you defined before.
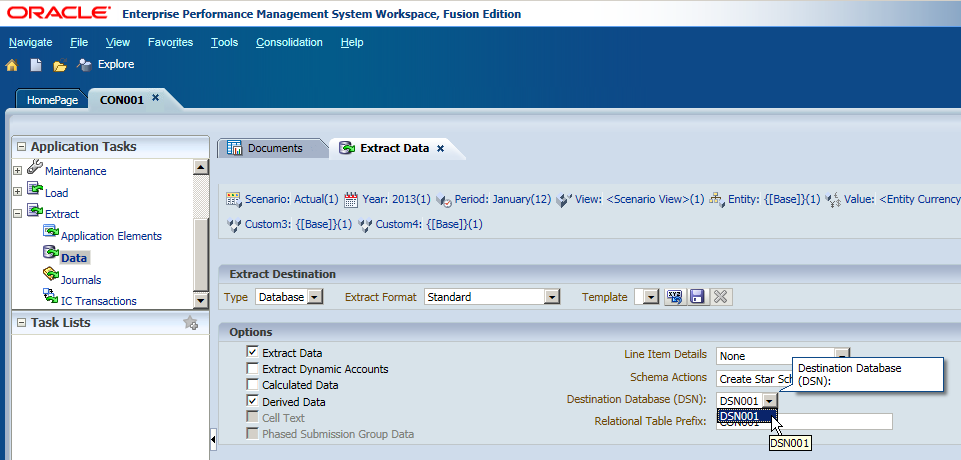

You can save the setting as a template which you can reuse it next time, click Save Template.


Input the Template Name and click OK.


After that, you can click Extract to launch the task.


You can view the running task and the progress of it.


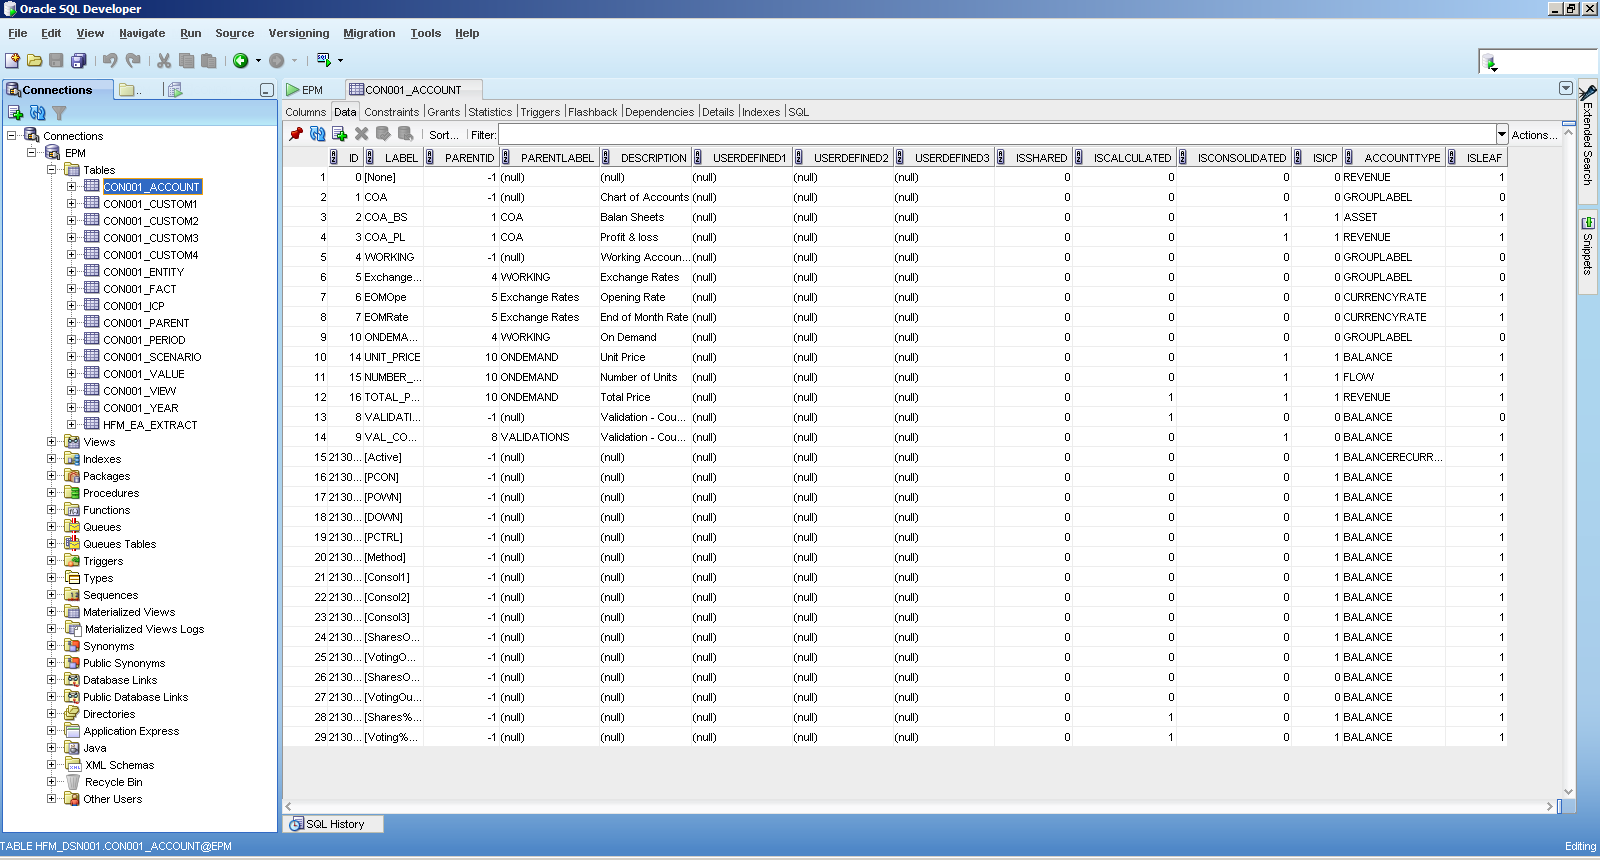
After the task's progress reached 100%, you can check the extract result in the relational database. You can find all the Dimensions are extracted with the member attributes.

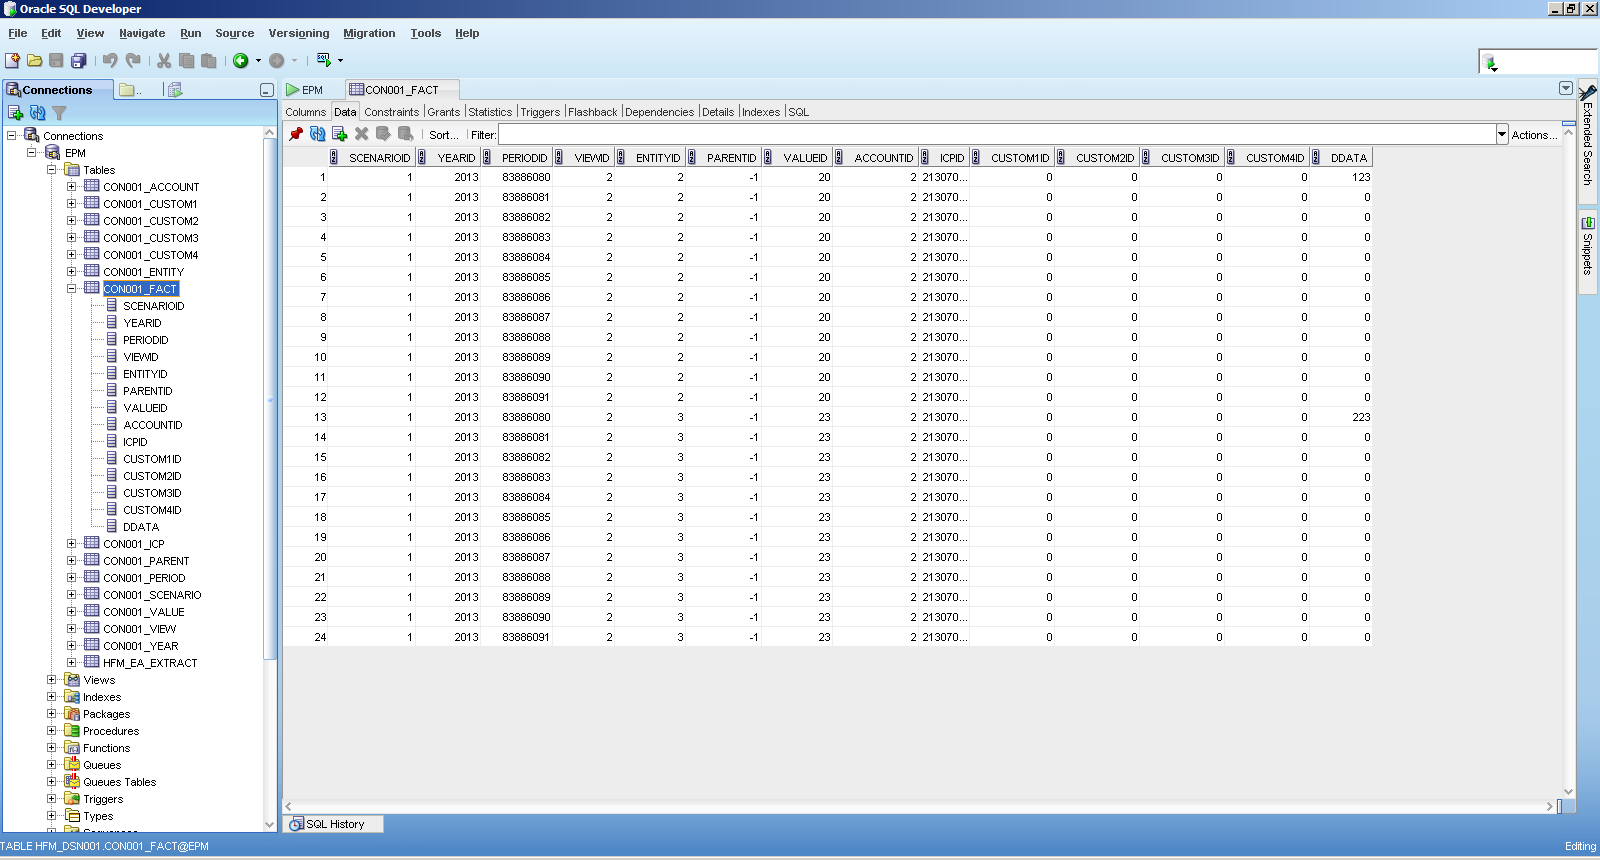
The fact data is stored in the table CON001_FACT.


Friday, March 28, 2014

HFM 11.1.2.3 (4) - Other new features

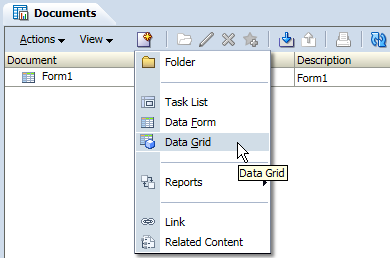
In Documents, we can add a new item as Data Grid. Here I want to introduce a new feature called "Favorite Members"


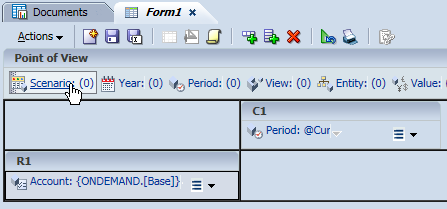
The default Grid layout was shown as below, click on any of the dimensions to select favorite members.


In the member selection page, click on Favorite Members Tab. If you have preference or have some members used very frequently, select them as your favorite members. Note that for one dimension you can only select one single member.

After all the changes have been done for the grid, save it.

Open the new created grid, now you can select your favorite member by clicking the small triangle. Favorite member is a method for your quickly select the POV members. All the users can define their own favorite members.

In the grid you can find a button "Open in Smart View", that means in this version Smart View can access data grids.

You can open the grid by clicking the button, or you can open it in Smart View directly.

Another new feature I want to introduce is Dynamic POV Member lists, which are created dynamically based on the current POV member of one or more dimensions. Note that these lists can only be used in Oracle Hyperion Financial Reporting and Oracle Hyperion Web Analysis. And this feature is only applicable for Entity Member lists.

First, create a member list file and load it to HFM. EntityLists(1) will show the Entity member with "GLOBAL" consolidation method, and EntityLists(2) will show the entities with POwn more than 50%. All the output entities depend on the selected Scenario, Year and Period.


Maintain the consolidation method and POwn in Manage Ownership for Actual - 2014 - January. Note that only 4 entities' consolidation methods are marked as Global.

Then change the period to February, make all the entities consolidation method as Global and then save the change.

Now I will create a financial report to show the dynamic member list. We can find that in this new version language can be selected in the FR Studio login page.

Then we create a FR report with HFM application as the data source. And in the design mode, we drag Entity dimension to the column. After that, select members for Entity. In the Lists page, you can find the member lists we loaded before, Global(@POV) and POWN(@POV). Select Global(@POV) as an example.

Input GROUP1 as Entity, keep Parent as empty. Then click OK to confirm.

Then you can find the selected member in the right Pane, click OK to confirm.

Then you can find the member selection as below.

Save the report.

Then go to Workspace and Explore the report.

Select Actual - 2014 - January as your POV member.

Then you can find only 4 entities are shown as below.

Then try to change the period.

Select February.

Because all the entities are marked as Global in February, all of them are shown in the report.

Thursday, March 27, 2014

HFM 11.1.2.3 (3) - Data Form

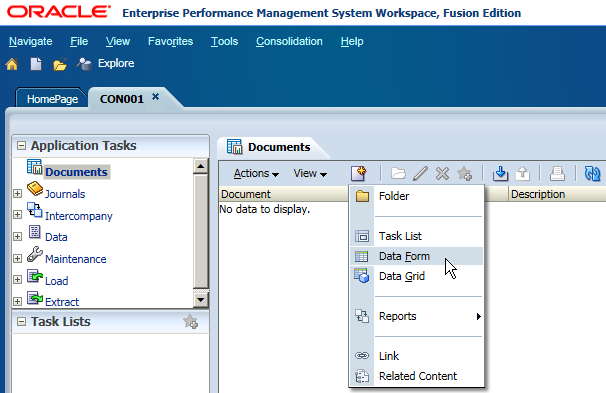
In Documents, you can create objects like folder, task list, data form, data grid and some other items. In this section, I will introduce some new features of Data Form.


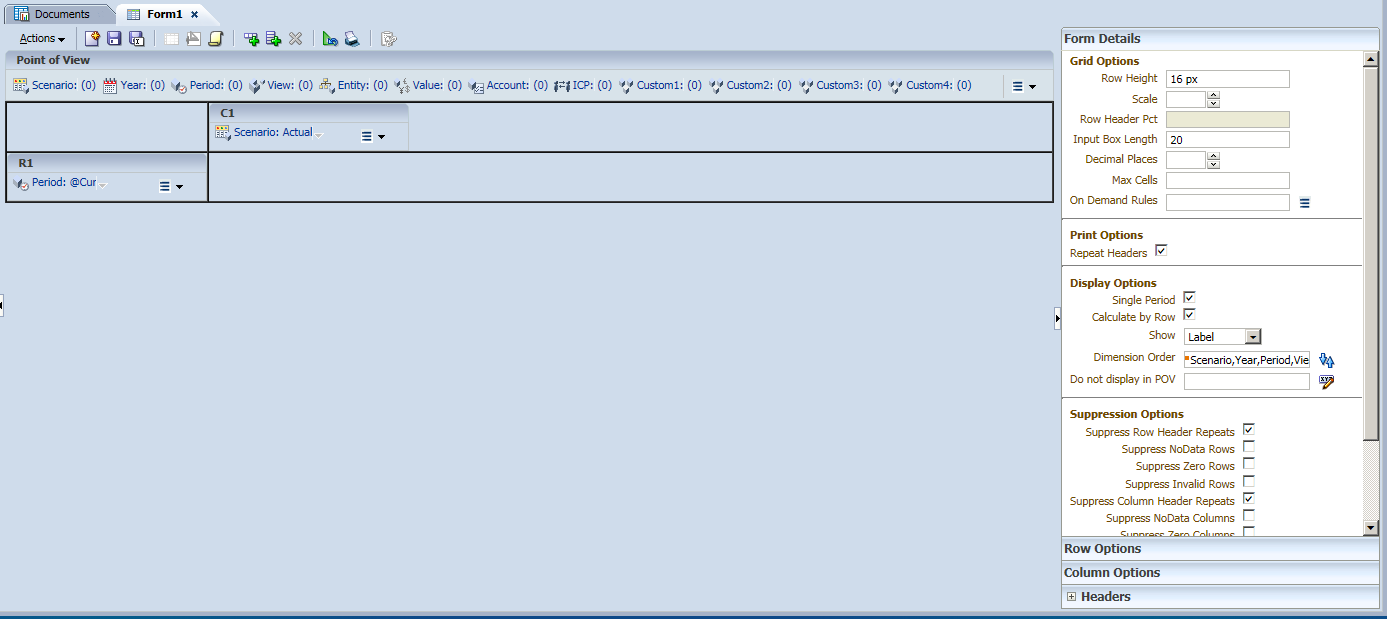
You can define the dimension layout and select members in the left Pane, and define the form's properties in the right Pane.


You can Add Dimensions in the Row or Column

Select the dimensions that you want to add, click OK.


You can Remove Dimension to POV by right-click it.

Select members for dimension.

Select member or with its relation

Select members for POV dimensions as well.

Specify the Background POV members by selecting a member. If you select a member list, it is used as a selectable POV, from which data form users can select members.

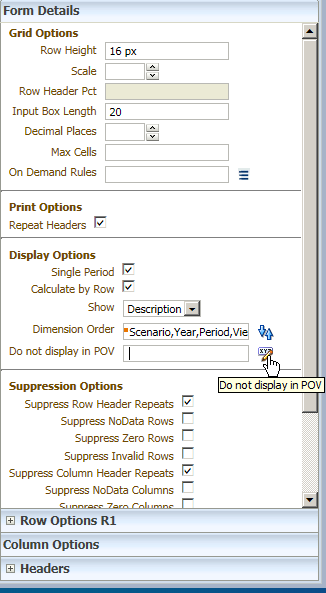
You can set which POV dimensions do not need to display in the Form Details of the right Pane.


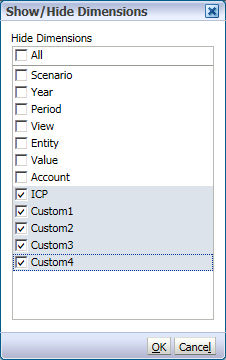
Select the dimensions that don't want to display, click OK

If you need to add more rows or columns, you can click Add new row/column

But I found one thing I don't know whether it is a bug, when I add the new row, nothing appeared in the R2 and I can't select member for it. I need to click "Script" to add members for R2 by inputting code in the script manually.


Input the R2 member you want to add, and then return to Designer mode


Then you can find the R2 member appeared and you can select it now. 

In this new release, you can create on-demand rules that can be run from data forms. On-demand rules are useful when you want to run only a subset of calculations to quickly see the results in the data form. Rules designer has been removed from this version, and you can create rules in a text editor such as Notepad ++. The rules are created in a new subroutine and are identified by the OnDemand prefix, for example, OnDemand_TotalPrice as below.


After you loaded the rule to HFM, you can specify on-demand rules for the data form, click "On Demand Rules" to select the rules to want to assign.


All the available on-demand rules are displayed here and you can select one or more of them for the form

If you know the rule names, enter them in the text box in a comma-separated list is OK as well.

After all the setting is done for the form, you can save it and name it.

If you can't see the form you have saved, click "Refresh"

Double click the new created form and then you can open it, the POV dimensions in blue color means that you can select member for them by clicking on it. And the black ones are background POV that you can't change.

And if users don't want to see some POVs, they can select Show/Hide Dimensions.

Uncheck the dimensions that don't want to display, click OK

Then you can find the unchecked dimensions are hidden.

In this new release, finally we can single-click to edit an input cell, it is the default setting of the application. If you don't like it, you can click "Disable Single Click to Edit".

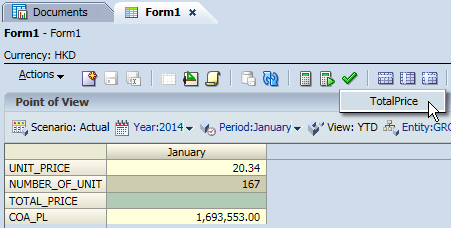
You can find one "Tick" button in the form, that's the new feature on-demand rule. Click the "Tick" and then you can select the pre-defined rules.


You can find the TOTAL_PRICE is calculated after the rule was launched.